Forms
Forms
An HTML form is used to collect user input. The user input is most often sent to a server for processing. An HTML form contains different kind of information such as username, password, contact number, email id etc.
There are various form elements available like text fields, text-area fields, radio buttons, submit buttons, check-boxes etc. Using these elements the information of a user is submitted on a web server.
The <form> tag is used to create an HTML form and it has following syntax −
<form>
     form elements like input, textarea etc.
</form>
The <input> Element
Input Elements are the most common elements which are used in HTML Forms.
An <input> element can be displayed in many ways, depending on the type attribute.
Few examples are as follows:
<input type="text"><input type="number"><input type="button"><input type="checkbox"><input type="email"><input type="password"><input type="radio"><input type="submit"><input type="image"><input type="date"><input type="month"><input type="range"><input type="reset"><input type="search"><input type="time"><input type="color"><input type="url">
The <input> tag has following syntax −
<form>
     <input type="" id="" >
</form>
The <label> Element:
The <label> tag defines a label for many form elements.
The <label> tag in HTML is used to provide a usability improvement for mouse users i.e, if a users clicks on the text within the <label> element, it toggles the control.
To associate the <label> with an <input> element, you need to give the <input> an id attribute. The <label> then needs a for attribute whose value is same as input’s id.
The <label> tag has following syntax −
<form>
     <label for="fName">First Name</label>
     <input type="text" id="fName" >
</form>
Example:
<form>
  <label for="name">Name</label><br>
  <input type="text" id="name"><br>

  <label for="contact">Ph No</label><br>
  <input type="number" id="contact"><br>

  <label for="mail">E-mail</label><br>
  <input type="email" id="mail"><br>

  <label for="pwd">Password</label><br>
  <input type="password" id="pwd"><br>

  <input type="submit" value="Submit">
</form>
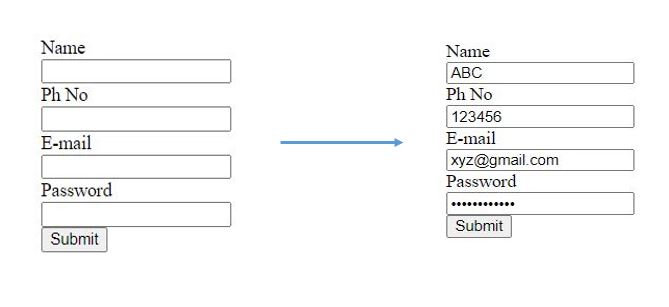
This will produce the following result −

Radio Buttons in HTML Form :
Radio Buttons are used to let the user select exactly one option from a list of predefined options.
Example:
<form>
  <input type="radio" id="male" name="gender" value="male">
  <label for="male">Male</label><br>

  <input type="radio" id="female" name="gender" value="female">
  <label for="female">Female</label><br>

  <input type="radio" id="other" name="gender" value="other">
  <label for="other">Other</label>
</form>
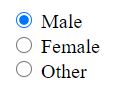
This will produce the following result −

Checkboxes in HTML Form :
Checkboxes are used to let the user select one or more options from a pre-defined set of options.
Example:
<form>
  <input type="checkbox" id="prog1" name="prog1" value="JavaScript">
  <label for="prog1">JavaScript</label><br>

  <input type="checkbox" id="prog2" name="prog2" value="Python">
  <label for="prog2">Python</label><br>

  <input type="checkbox" id="prog3" name="prog3" value="Ruby">
  <label for="prog3">Ruby</label><br>

  <input type="checkbox" id="prog4" name="prog4" value="Java">
  <label for="prog4">Java</label><br>

  <input type="checkbox" id="prog5" name="prog4" value="C++">
  <label for="prog5">C++</label>
</form>
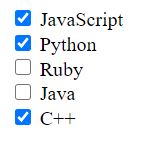
This will produce the following result −

Select Boxes in HTML Forms :
Select boxes are used to allow users to select option from a pull-down list of options.
Select boxes are created using two elements which are <select> and <option>. List items are defined within the select element.
Example:
<form>
  <label for="country">Country:</label>
  <select name="country" id="country">
            <option value="India">India</option>
            <option value="Sri Lanka">Sri Lanka</option>
            <option value="Australia">Australia</option>
            <option value="Canada">Canada</option>
            <option value="England">England</option>
  </select>
</form>
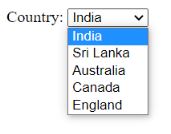
This will produce the following result −
